Showing posts with label Thanksgiving. Show all posts

Friday, December 3, 2010

Thirsty Thursdays: Festive Friday Edition


Yes, I do realize that its Friday today, but as we're kicking off the holiday cocktail party season, it only seems fitting to toast the weekend with a festive libation.

Last week, the Diva Family Thanksgiving celebration began with a lovely little sipper that's just perfect for any holiday gathering. I'd like to share it with you today.

This ruby red beauty features a seasonally appropriate mix of pomegranate juice and champagne (or sparkling wine), spiced with a subtle hint of ginger and mellowed with just a bit of orange juice.

Pomegranate Champagne Cocktail:
  • 2 cups pure pomegranate juice (such as POM Wonderful)
  • 4 tablespoons ginger syrup *
  • 1/4 cup orange juice
  • 1 bottle of Champagne or sparkling wine
  • some pomegranate seeds (arils) for garnish
In a small pitcher, combine the pomegranate juice and ginger syrup, whisking well with a small wire whisk to combine. Add the orange juice and stir to blend.

Fill a champagne flute 1/3 full with pomegranate mixture, then top with Champagne to fill. Garnish with a few pomegranate arils if desired. Serve and enjoy, repeat as necessary!

*A brief note about the ginger syrup: I used bottled ginger syrup (see above link), though you could certainly make your own simple syrup and infuse it with some fresh ginger, if you're feeling enterprising. If not, avail yourself of the bottled ginger syrup - its wonderful stuff.

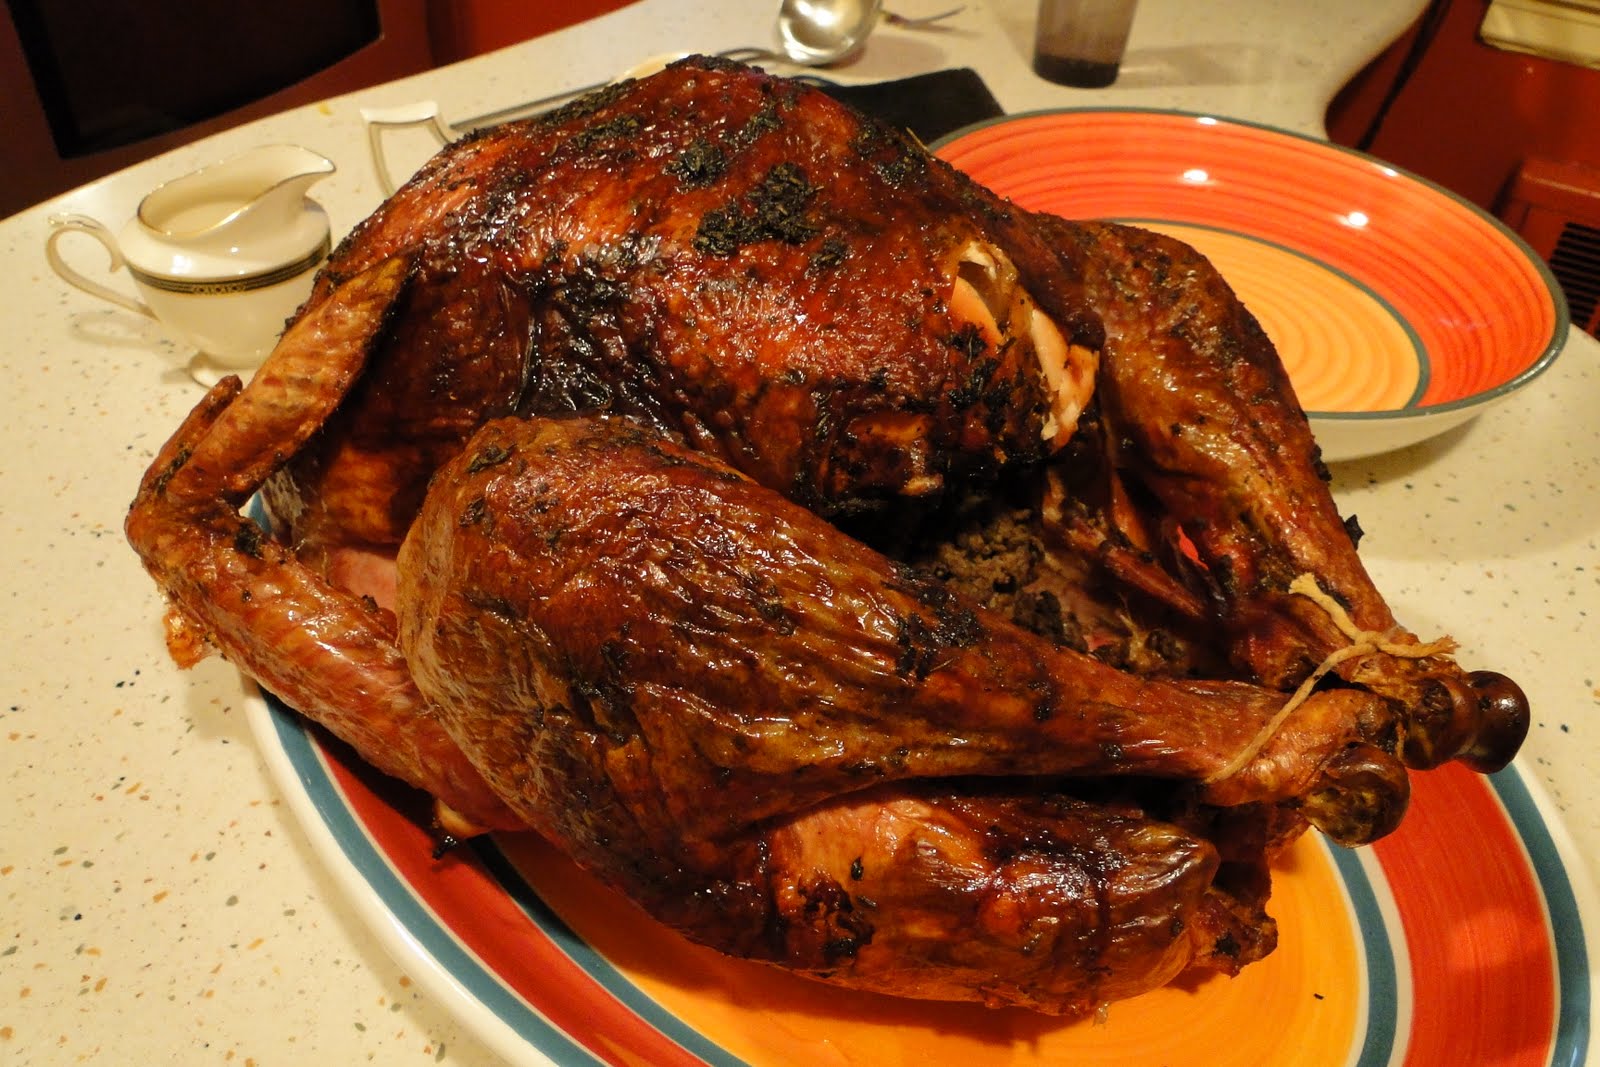
Of course we did have turkey ...

and all the trimmings as well.


While the turkey was the star of the show, the pomegranate cocktail was a close second! Why it even received the Mama Diva Seal of Approval, so you know it must be good. I hope you'll try it for your next holiday brunch or cocktail party.

Cheers!

Wednesday, November 24, 2010

Happy Thanksgiving!

I'm cooking and cleaning and generally getting my Martha on today. Busy trying to cross things off my seemingly endless to do list and really looking forward to the festive meal tomorrow.

I'll be posting a holiday round-up next week. Just popping in to wish all of you and yours a wonderful, joyous, delicious, Happy Thanksgiving! May your cups runneth over and your waistbands be forgiving!

Enjoy the holiday!

xoxoxoxoxo
Diva

Thursday, November 18, 2010

Thanksgiving Recipes

Here we are staring straight down the barrel of another Thanksgiving. And every year at this time, I find myself asking the same questions: "Who are these people and why must I continue to provide them with nourishment??"

I kid, I kid. These people are my family and I'm happy to provide them with nourishment. The trouble is, my people prefer to take their holiday nourishment in the exact same form every year. Not a single deviation would be welcomed. They want what they want, and the people will have their traditional foods this Thanksgiving ... as they have every other year since the dawn of creation.

Now, that wouldn't be so bad, were I not a food blogger and in need of fresh content! Hello, might we have some lovely crisp-roasted brussels sprouts instead of the green bean casserole? No. No, we can't. So what's a blogger to do?

Provide you with links to my previously posted holiday recipes. Perhaps you're a new reader and you've missed them the first time. Or maybe your people are amenable to a bit of deviation at the holidays. If so, color me jealous. In any case, consider this a "Best of Diva" Thanksgiving style. Enjoy!

Diva Family Thanksgiving Favorites:

Recipe for Make-Ahead Gravy - this one's a time saver and a life-saver.

Herbed Bread Stuffing - my take on a classic.


Cranberry Port Conserve - my all-time favorite cranberry sauce.


Pumpkin Cranberry Bread - a seasonal treat with all the warm spices.

Pork Stuffing - a tender recreation of my mother in law's recipe.

So, tell me about your people. Do you switch up the holiday menu? Or are you part of a traditional tribe? Curious Diva wants to know.

Bon appetite!

Wednesday, December 2, 2009

Thanksgiving Re-Mix: Stuffed Peppers Edition


At first glance, this post is going to look like it won't be of much use to you - especially if you don't have any leftover pork stuffing hanging around. And though I'll include a recipe, its not really about the recipe. Its about using what you've got. Its about recycling and remixing. And, most of all, its about playing with your food.

If you've got a fridge full of holiday leftovers mocking you every time you open the door, this post is for you. And, honestly, it doesn't much matter what kind of leftovers you've got - anything will do. Mainly we're talking about a technique here; recombining and recreating a little magic from the scraps of the holiday. If you have some meat stuffing, great! If not, feel free to use bread stuffing. No stuffing at all? I'm sure you could use mashed potatoes.

The same goes double for the vegetables and spices I've used. Go right ahead and play around with them. You could use almost anything in both the sauce and the stuffing. Do as you see fit and cook with what you've got!

Stuffed Peppers:
For the Sauce
  • 2 teaspoons extra-virgin olive oil
  • 1 small carrot, peeled and diced
  • 1 rib of celery, leave included, diced
  • 1/2 cup of diced onion
  • Kosher salt and freshly ground black pepper
  • pinch of crushed red pepper flakes
  • 3/4 teaspoon sweet Hungarian paprika
  • 1/2 teaspoon ras el hanout
  • 1/4 cup of dry red wine
  • one 15 ounce can of plain tomato sauce
  • 1 teaspoon red wine vinegar
  • 1/3 cup low sodium chicken or vegetable broth
  • 1 tablespoon of chopped fresh dill
  • 1 tablespoon of chopped fresh parsley
Heat the olive oil in a skillet over medium-high heat and to it add the carrots, celery and onions. Season with a bit of salt and pepper and a pinch of crushed red pepper flakes and saute until the onions are translucent and the vegetables have softened a bit, about 3 to 4 minutes. Add the paprika and the ras el hanout, stir to combine and saute for one minute. Add the red wine, stir and saute until reduced by half. Add the tomato sauce, the vinegar, the broth, the dill and the parsley, stir well, bring the mixture to a boil, then reduce the heat, cover and simmer for 10 to 15 minutes. Taste and adjust the seasoning. Remove from heat and reserve.

For the Peppers
  • 2 large bell peppers, any color
  • 2 teaspoons extra-virgin olive oil
  • 1 small shallot, peeled and diced
  • 1 small carrot, peeled and diced
  • 1 cup of leftover pork or meat stuffing or dressing
  • 1 cup of cooked quinoa (or bulgar, brown rice or couscous)
  • 1/2 cup of cooked, chopped tukey
  • 1/4 cup of leftover gravy
  • some chopped fresh dill
  • some chopped fresh parsley
  • 2 tablespoons grated Parmesan cheese, for topping
  • 2 tablespoons seasoned dried whole wheat bread crumbs, for topping
  • 2 teaspoons chopped fresh parsley, for topping
Slice the peppers in half length-wise and remove the stems, cores and seeds. Reserve.

Heat the oil in a large non-stick skillet over medium-high heat and to it add the shallots and carrots. Saute until the shallots are translucent, about 3 to 4 minutes. Add the pork stuffing and the quinoa, stirring well to combine. Add the turkey and the gravy, stir and allow it to melt into the meat mixture. Add the parsley and dill, stir well to combine, then remove from heat and reserve.

In a small bowl, mix the Parmesan cheese, dried bread crumbs and chopped parsley together. Reserve.

Pre-heat your oven to 350 degrees F.

To stuff the peppers: Place the reserved sauce in the bottom of an oven safe baking dish, and nestle the peppers, skin side down, into the sauce. Fill the inside of the peppers with the reserved meat and quinoa mixture. Top each of the stuffed peppers with some of the Parmesan and bread crumb mixture and dot with a little bit of butter. Cover the dish with foil and bake in the middle of a pre-heated 350 degree oven for 30 minutes.

Remove the foil and allow the peppers to bake for an additional 10 to 15 minutes or until the tops are lightly golden and the peppers are just beginning to soften. Serve drizzled with some sauce from the bottom of the pan and a dusting of fresh herbs. Enjoy!

My objective in adding all of that dill, and the ras el hanout and vinegar, to the sauce was to make something that did not taste like Thanksgiving! ... And, it didn't. The resulting sauce was well balanced; a bit spicy, slightly tangy and the perfect foil for the rich pork stuffing. If you're not a fan of dill, by all means feel free to substitute. Ditto for the quinoa - any cooked rice, grain or pasta would work as well.

I'll be submitting both this dish and the Baked Eggs in Stuffing Cups to 5 Star Foodie's Thanksgiving Leftovers Make-Over Challenge. Be sure to check out 5 Star Foodie on Monday, December 7th for a full round-up of all the leftover creations!

Stay tuned for my Thirsty Thursdays give-away tomorrow ... it will be most unusual and refreshing!

Bon appetit!

Tuesday, December 1, 2009

Stuffed!


Initially, I thought I'd be doing a full recap of our Thanksgiving meal yesterday ... but as it turns out, I went and got my hair done instead! A Diva's got to do what a Diva's got to do. Besides, I don't know about you, but I think I might be a little over Thanksgiving at this point.

At a minimum, I'm over the foods. We had a wonderful holiday, it all went off without a hitch, and the meal was as delicious as can be. I'm just tired of eating it. And, I bet you are too. Sure there was turkey and gravy, mashed potatoes and turnips, two kinds of stuffing, cranberry sauce, green beans with mushrooms and onions, dinner rolls and an abundance of wine. The company was excellent and the desserts were plentiful. Really, we were well and truly blessed this holiday.

And now I'm blessed with a fridge full-to-bursting with the remains of the feast. Rather than recapping, suffice it to say that much of this week will instead be devoted to turning those leftovers into other meals. Let's start with breakfast, shall we?

Last week, Papa Diva told me about an idea he heard on his local radio station. Seems that a woman called in to describe her unusual use for leftover bread stuffing. She uses the stuffing to line a muffin tin and bakes an egg inside each little cup of stuffing. Color me intrigued!

On Sunday, I gave the suggestion a whirl ...

Baked Eggs in Stuffing Cups:
  • butter for greasing the muffin tin
  • some leftover bread dressing or stuffing
  • large eggs
Pre-heat your oven to 350 degrees F and butter your muffin tins.

Spoon some bread dressing or stuffing into each muffin cup, enough to cover the bottom and sides of the cup completely. Using your (clean) fingers, press the stuffing down to flatten the bottom and shape it to fit the cup, pressing it up the sides and slightly above the rim, making sure to leave a depression in the center that is large enough to accommodate an egg. When finished, you should have roughly 1/2 inch of stuffing lining each cup.

Crack a large egg into the center of each stuffing cup and bake in the middle of a 350 degree oven for 15 to 25 minutes, depending on the speed of your oven and your desired egg consistency. I baked mine for about 22 minutes and that was perfect for my oven - the whites were completely set and the yolks were slightly runny. Use your best judgement and begin checking the eggs at the 15 minute mark, then every 5 minutes after until they are done to your liking.

Remove the stuffing/egg muffins from the tin, garnish with some fresh herbs, serve and enjoy!

What an outstanding use for leftover stuffing! The savory herbed bread mixture was exquisite when paired with the silky baked egg. If I had thought of it, I would have been wise to mix a bit of leftover pork stuffing in with the bread for an even better stuffing McMuffin! Next time for sure.

I could also see adding a bit of cheese to the mixture, or perhaps dusting the top of the egg with a bit of shredded Parmesan or even some cream. We're mainly talking about a technique here and you should feel free to get creative with it. Heck, you might even decide to top the whole thing off with gravy or add a bit of mashed potatoes to the mix. The bottom line here is that this is a fun and festive way to start the day ... and a great way to make a dent in some of those holiday leftovers. Thanks, Papa Diva ... and thanks to the mystery caller, whomever she is!

Stay tuned for more of my Thanksgiving remix this week as I make my way through the fridge. And be sure to come back on Thursday for a very special edition of Thirsty Thursdays ... I've got a fabulous give-away to go along with a most unusual cocktail.

So, are you getting creative with your leftovers this week? Got any tips for something a little off-beat and unexpected? Curious Diva wants to know.

Bon appetit!

Edited to add: I'll be submitting this dish to 5 Star Foodie's Thanksgiving Leftovers Make-Over Challenge. Be sure to check out 5 Star Foodie - Culinary Adventures on Monday, December 7th for a full round-up of all the leftovers!

Wednesday, November 25, 2009

Happy Thanksgiving!

We're coming down to the wire now, things are simmering, stuffing is defrosting, silver is being polished and wines being chilled. Its all coming together and I'm really excited about the big feast tomorrow! I've been cooking for weeks now and I'm ready to eat!

I'm not anticipating any disasters tomorrow, nor should you. But just in case, Woman's Day has graciously provided me with a few more links ...

Solutions for 11 Thanksgiving Disasters - Quick fixes for everything from gluey mashed potatoes to "help, the dog ate my turkey" ... let's hope no one needs that particular tip!

10 Ways with Leftover Turkey - Ten quick and easy way to re-purpose your leftover bird

Personally, I will be in a vegetative state on Friday ... my feet will be up and I'll be firmly glued to the couch having a much needed rest after the madness. If you're planning to brave the crowds and begin your holiday shopping, this link is for you ...


Whether you're cooking or dining elsewhere tomorrow, I wish you all a wonderful, blessed and very Happy Thanksgiving! May your plates be full and your belt be loose! ~wink~

I'll be back with a full recap on Monday.

Bon appetit!

Monday, November 23, 2009

Recipe for Herbed Bread Stuffing


There it is - a whole tray of the evil white stuff ... bread! It may be evil and it may be ordinarily off-limits, but there's no denying that plain 'ole white bread makes for some delicious stuffing!

Normally, the bread stuffing is left to the ministrations of Mama Diva, while I focus on the pork stuffing. This year, things are a little bit different. Mama and Papa Diva will be dining in CT with bro and his wife ... so it looks like the bread stuffing is up to me. And, I'm going to be honest, I cheated a little bit too. I mixed the bread, veggies and seasonings with some pre-packaged stuffing cubes. You can see the package in the background of that photo. So sue me, a Diva's got to take a little help where she can get it now and then.

Herbed Bread Stuffing / Dressing:
  • two 16 ounce loaves of plain white bread, or stuffing bread, unsliced
  • 2 sticks of butter
  • 2 large onions, peeled and diced
  • 3 large shallots, peeled and diced
  • 6 large stalks of celery, diced
  • 2 large leeks, white and pale green parts only, washed well and sliced thin
  • some Kosher salt and freshly ground black pepper
  • poultry seasoning
  • celery salt
  • 4 cups of packaged, seasoned stuffing cubes, such as Pepperidge Farm
  • 2 tablespoons chopped fresh sage (or 1 tablespoon dried)
  • 2 tablespoons chopped fresh thyme (or 1 tablespoon dried)
  • 1/2 cup of chopped fresh parsley
  • 1 1/2 to 2 cups low-sodium chicken broth
  • additional chicken broth for baking dressing
Pre-heat your oven to 300 degrees F.

Slice the bread into thick slices, then tear the slices into roughly 1 inch pieces. Scatter the torn bread on a large, walled cookie sheet and bake in a 300 degree oven for 15 minutes, turning once or twice, until the bread begins to dry. Do not brown or toast the bread, you just want to dry it out a bit. Remove from oven and reserve.

Melt the butter in a very large stock pot and to it add the onions, shallots, celery and leeks. Season with a bit of Kosher salt, freshly ground pepper, a generous sprinkle of poultry seasoning and celery salt, stirring well to combine. Saute over medium-high heat, stirring as needed, until translucent and tender but not yet browned, about 8 to 10 minutes or so. Add the seasoned bread cubes to the pan and stir well. Add the white bread and stir to combine, adding a cup of chicken broth to the pan to moisten. Continue stirring and adding a bit more chicken broth until the stuffing holds together and your desired consistency is achieved.

Remove from heat and add the chopped sage, thyme and parsley, stirring well to combine. Taste and adjust the seasonings, adding more salt and pepper, or whatever you wish, if necessary. (At this point, the stuffing can be cooled, placed in a suitable container or zip lock bag, and frozen until needed. )

To Serve as Dressing: butter a 9 x 13 inch oven safe baking dish and transfer the stuffing mixture to the prepared baking dish, smoothing it out to form an even layer. Pour some additional chicken broth over the mixture to keep it moist, cover with foil and bake in the middle of a pre-heated 350 degree F oven for 15 to 20 minutes, remove the foil and continue baking for another 15 t0 20 minutes or until golden brown on top and heated throughout. Serve and enjoy!

As written, this recipe will serve 12 to 15.

Notes: While I do know that stuffing cooked outside the bird is called dressing, in my family its called stuffing regardless! If desired, you can certainly use this mixture to actually stuff your bird, and the excess can be baked off on the side as directed above.

I do not measure the salt, pepper, poultry seasoning or celery salt, nor do I measure the fresh herbs. I just keep adding stuff until it tastes right to me. Do as you see fit. If you're a big fan of thyme or sage, by all means add more. Generally, I prefer to use the fresh herbs, though there's no reason you can't use dried if that's your preference. Hey, its your holiday, live it up!

As for that packaged stuffing mix ... what can I tell you? Tough times call for tough measures! Besides, its not all that bad ... the mix did contain both whole wheat and white bread cubes, so its practically a health food. ~wink~

I'll be firmly ensconced in my kitchen for the next few days and likely out of action here on the blog. I'll be back with a full Thanksgiving round up next week and, hopefully, we can return to normal here for a short while - or at least until the Christmas madness kicks in.

So, are you taking any culinary short-cuts this week? 'Fess up in the comments ... I hate to cheat alone!

Bon appetit!

Friday, November 20, 2009

More Thanksgiving Recipes from Woman's Day

We're heading into the home stretch - Thanksgiving is only six days away! If you're anything like me, and judging from the comments this week - you are, that means there's still a ton of work to be done. There's silver to polish, little used wine glasses to wash, extra chairs to be found, and, oh yeah, I suppose people will want to eat something when they show up next Thursday too.

Fortunately, I'm prepared to help. If you're still cobbling together your menu and writing out your shopping lists for the weekend, this post is for you. Seems that someone from Woman's Day took notice of my post on the Make-Ahead Gravy yesterday and the magazine has been kind enough to pass on some links for me to share with you. And not just any old links either, this list is a veritable cornucopia of tasty ideas and tempting recipes that are sure to please! Just take a look ...

5 Great Gravy Recipes - including another version of the Make-Ahead Gravy

8 Unconventional Thanksgiving Side Dishes - including a to-die-for Corn and Leek Pudding recipe

9 Turkey Stuffing Recipes - including a quick and easy crock-pot stuffing that sounds like a keeper

4 Decadent Thanksgiving Desserts - including Mile High Pumpkin Meringue Tart. My sister in law has been making her own version of a pumpkin meringue pie for years now and it is amazing. If you've never had pumpkin meringue, you don't know what you're missing!

10 To-Die-For Thanksgiving Pies - including a rich and delicious Chocolate Chip Pecan Pie

15 Holiday Cranberry Recipes - everything from salads to main courses and desserts, including a simply gorgeous Cranberry Sorbet

5 Pumpkin Puree Recipe Ideas - some unusual ideas for using pumpkin puree, including adding some to hummus, chili, and corn muffins

If you're a visual person, take a look a the whole shebang here: Woman's Day 2009 Thanksgiving Recipes and Ideas ... the pictures are sure to tempt you and that link includes ideas for appetizers, wines, easy clean-up tips and more!

I want to extend my thanks and gratitude to the people at Woman's Day for offering these links. Clearly, there's something here for everyone and you're bound to find a new family favorite tucked away in there somewhere. Thank you, Woman's Day and Happy Cooking, dear readers!

Bon appetit!

Thursday, November 19, 2009

Recipe for Make-Ahead Gravy


Come closer and pay strict attention, I'm about to divulge my greatest Thanksgiving Tip of all. Its the tip that preserves my sanity, the balm that soothes my soul. Its called Make-Ahead Gravy and its discovery was a revelation for me.

Now, I'll allow for the possibility that this is not a revelation for you. Perhaps you're more savvy or more brave than I - but up until 5 years ago or so, I had no idea that you could actually freeze gravy. It all started the year I was hosting an unprecedented 16 for Thanksgiving. I was terrified that I wouldn't have enough gravy to go around the table, much less any for leftovers. Panic stricken and desperate, I was flipping through a November issue of Woman's Day and low and behold there was an entire article on cooking in advance for Thanksgiving ... including the gravy. Color me hopeful ... and slightly dubious!

Turns out there was no need to worry; frozen gravy defrosts just fine - and though the texture may seem a bit strange at first, it all comes together in the reheat with the help of a wire whisk. I've long since lost the actual recipe, and I've adapted and refined the method as the years have gone on. This is my version and it is a God-send!

Make-ahead Gravy:
  • 4 large turkey wings
  • 1 large turkey leg
  • 1 large (or 2 medium) onion(s), peeled and quartered
  • 3 large shallots, peeled and quartered
  • 2 large carrots, peeled and quartered
  • 2 large parsnips, peeled and quartered
  • 1/3 cup of Vin Santo, Sherry or Port Wine
  • 1 teaspoon poultry seasoning
  • some Kosher salt and freshly ground black pepper
  • 2 tablespoons butter
  • 5 large whole sprigs of fresh thyme
  • 6 cups of non-fat, low-sodium chicken broth
  • 2 cups of low-sodium vegetable broth
  • 1/4 cup Vin Santo, Sherry or Port Wine (this is in addition to the above)
  • 1 additional cup of vegetable broth
  • some water
  • 6 tablespoons of softened butter, or 2 tbsp. of fat from the pan drippings
  • 6 tablespoons all purpose flour
Pre-heat your oven to 400 degrees F.

Place the turkey wings and the leg in a large, heavy roasting pan, skin side up, and around them scatter the onions, shallots, carrots and parsnips. Pour 1/3 cup of Vin Santo, Sherry or Port Wine over the turkey and dust the entire pan with a bit of poultry seasoning, Kosher salt and freshly ground black pepper. Dot the turkey parts with a bit of butter and place some sprigs of whole fresh thyme in and around the pan. Roast in the middle of a pre-heated 400 degree oven for 1 hour and 15 minutes.

Remove from oven and place the wings, leg and all of the vegetables into a large stock pot. To the stock pot, add 6 cups of chicken broth and 2 cups of vegetable broth. Cover, bring to the boil, reduce heat and simmer for 1 hour and 15 minutes.

Meanwhile, deglaze the roasting pan: add 1/4 cup of Vin Santo, Sherry or Port and 1 cup of vegetable broth to the pan and heat over high heat, scraping up the browned bits from the bottom and sides of the pan. Stir frequently and allow the mixture to boil, reduce heat and continue simmering and scraping for 2 or 3 minutes, adding some water to the pan, if necessary, to keep things liquid. Remove from heat and pour the contents of the pan into a defatting cup. Allow the fat to separate, then strain the liquid only into a large sauce pan. Reserve until the turkey/broth mixture has finished cooking.

Once the turkey parts have finished simmering, remove them from the cooking liquid. Discard the bones and save the meat for another use if desired. Strain the broth into a container large enough to hold it and to it add the reserved pan juices. Stir to combine and reserve.

Make a beurre manie by combining 6 tablespoons of softened butter with 6 tablespoons of flour, mixing them together to achieve a thick paste. (Alternately, you could use the fat from the roasting pan, mixed with the flour, which is what I do.) Heat a large, heavy bottomed stock pot over medium high heat and to it add the beurre manie, stirring well with a wooden spoon to heat. Slowly add some of the reserved stock mixture, about a cup, raise the heat to high and whisk vigorously with a wire whisk until the mixture begins to thicken. Allow the mixture to come to the boil. Continue adding the stock slowly, whisking all the while, until all the stock has been added. Reduce heat slightly and boil gently, while stirring and whisking, for 4 to 5 minutes until the gravy begins to thicken and any lumps have been dissolved. Taste and adjust the seasoning, adding some salt, pepper, a bit of sherry, or whatever you like, if desired.

Should you desire a thicker gravy, you can make an additional batch of beurre manie and add it little by little until your preferred consistency has been achieved. Once finished, strain the gravy through a mesh strainer into a covered, freezer-safe container and chill in the fridge until completely cool. Once cooled, transfer the container to your freeze and store until needed.

The frozen gravy will keep, in the freezer, for up to a month. To use, remove from freezer the night before needed and thaw in the fridge over night. Transfer to a large, heavy bottomed sauce pan and heat over medium to medium-high heat, whisking well to smooth the mixture, until hot. Serve and enjoy!

As written this recipe will yield approximately 5 to 6 cups of finished gravy.

I'll admit that there's a fair bit of work involved here, but I think its worthwhile. Spending an afternoon making a rich and wonderful gravy take some of the pressure off of the actual day of the holiday. I will still make a fresh gravy on the day of Thanksgiving and will combine it with my defrosted mixture. The result is one happy Diva and enough gravy to satisfy an army. Color me delighted!

Bon appetit!

Monday, November 16, 2009

Odds and Ends-Thanksgiving Prep Edition


As you may have noticed, I've been MIA for a few days. My DSL modem conked out on Thursday - seems the Connectivity Gods have not been smiling on me of late. Its frustrating to say the least.

I'm behind in posting and way, way behind on my Thanksgiving prep. How can it be that the holiday is next week? Is that a joke? Did I miss the punch line?! Well, the joke's going to be on me ... or rather my guests ... if I don't get to work. So work, I will. Today will be dedicated to making my mother in laws's famous pork stuffing and Wednesday will be devoted to make-ahead gravy. Both items will take up residence in my freezer, once completed, and perhaps then I'll finally feel like I've got the holiday prep under control ... or at least begun!

Making a batch of flavorful gravy ahead of time is just one of my tricks for a less-stressed holiday. Let's be honest, people really like gravy - and I'm always worried that there won't be enough for everyone, so I make a LOT. Of course, I'll still make gravy on Thanksgiving day itself; I'll add it to my defrosted version and before you know it we'll all be swimming in gravy. More importantly, there will be plenty leftover for reheats.

I'll be posting the make-ahead recipe later in the week, perhaps on Thursday, after I've had a chance to snap a few pics. In the meantime, I thought I might direct you to some my other holiday offerings from last year:

Pumpkin Cranberry Bread - A simple and delicious quick bread that's just perfect for Thanksgiving morning

Pumpkin Pecan Waffles - The miraculous result of some leftover pumpkin puree


Glorious Gravy - A discussion of my Grandma's unusual method for making gravy

Its off to the kitchen for me ... what about you? Are you knee-deep in holiday prep? Do you like to cook in advance and get a jump start on the festivities? Tell me about what you'll be cooking this week for Thanksgiving ... curious Diva wants to know!

Monday, September 14, 2009

Cook Once, Eat Twice: Chicken Edition

I'm a big fan of cooking once and eating twice ... which, of course, is just another way of saying I like leftovers. They're like money in the bank. I mean, really, if you're going to go to the trouble of cooking, you might as well cook BIG and set yourself up for a week of tasty meals.

While I can't imagine that any of you actually need a recipe for roast chicken, I'm going to offer you one anyway. Why? Because a simple roasted chicken is perhaps the easiest, most economical and versatile way to cook once and eat twice ... or thrice!

In this case, I roasted a bunch of new and sweet potatoes along with the bird and later in the week we'll be using the leftover potatoes, along with some chicken, to form a delicious and savory chicken hash.

Herb Roasted Chicken:
  • 1 whole roasting chicken, about 3 1/2 pounds
  • 2 tbsp. extra virgin olive oil
  • 2 large cloves of garlic, peeled and minced
  • pinch of Kosher salt
  • 1 tbsp. chopped fresh rosemary
  • 1 tbsp. chopped fresh thyme
  • 1 tsp. Emeril's Chicken Rub
  • 1/2 tsp. poultry seasoning
  • generous grating of fresh black pepper
  • 1/4 to 1/2 cup of dry white wine
  • one medium onion, peeled and sliced
  • 2 large carrots, peeled and cut into large chunks
  • 1 medium poblano pepper, cored, seeded and sliced, if desired
  • 2 large shallots, peeled and quartered
  • 1 cup chicken broth or stock
Pre-heat your oven to 375 degrees F.

Mince the garlic and sprinkle it with a pinch of Kosher salt. Mash the garlic and salt into a paste by pressing the flat of a large chef's knife against the garlic and dragging the flat of the blade across the garlic and salt. Continue mashing and pressing until the garlic has softened and is the consistency of a thick paste. Scrape up the paste and place it into a small dish. Add the olive oil, rosemary, thyme, Emeril's Chicken rub, poultry seasoning and some freshly ground black pepper. Whisk well to combine. Reserve.

Place the chicken into a large roasting pan, breast side up, and drizzle inside and out with the white wine. Slather the outside of the entire chicken with the reserved oil and herb mixture to coat. Place a few slices of onion into the cavity of the chicken and sprinkle the rest atop and around the chicken. Add the carrots, pepper strips and shallots to the bottom of the pan, nestling them around the bird.

Roast in the middle of a pre-heated 375 degree oven for approximately 1 1/2 to 1 3/4 hours, or until done.

After the bird has roasted for one hour, pour 1 cup of chicken broth over the chicken and into the pan, then continue roasting for 1/2 to 3/4 of an hour.

Depending on the size of your bird and the quality of your oven, the chicken may take some additional time to cook. The safest way to determine if a chicken is cooked is to use an instant read thermometer. The FDA recommends cooking chicken until a minimum internal temperature of 165 degrees has been reached. To check the temperature, insert an instant read thermometer into the thickest part of the breast or between the inner most thigh and wing. You may also refer to this FDA Chicken Fact Sheet for approximate cooking times and further instructions. Personally, I like to roast mine until it reaches 170 degrees ... better safe than sorry! I also prefer to roast at 375F rather than 350F - and, again, that's just me.

The finished bird should be well browned and the juices will run clear when poked with a knife. Remove the cooked chicken from the pan and tent with foil, allowing it to rest for at least 5 minutes before carving. Meanwhile, strain the juices from the pan, reserve, and remove the cooked carrots and peppers, etc. for serving alongside the chicken. To serve, carve the chicken and drizzle with the reserved cooking liquid and some of the pan vegetables. Enjoy!

Now, obviously, if you're cooking for a larger crowd you should roast a larger chicken. A 3 1/2 pound bird is enough to serve the two of us for most of the week. Cook according to your needs, but do cook enough to have some leftovers if you want to play along with me this week.

Come back tomorrow and I'll tell you all about those yummy roast potatoes and we'll get to that chicken hash on Wednesday.

Bon appetite!

Monday, December 1, 2008

Thanksgiving Round-up ...

I know I said I'd do a better job with the turkey photography this year. The reality? It wasn't even on my radar screen! In the mad rush to get everything on the table any ideas I'd had about taking the perfect turkey picture flew right out the window. What you see here is *half* of our turkey ... the half we didn't devour. It was a fresh, organic, 18 pounder and it was spectacular! The smell of it roasting turned us all into ravenous animals. So eager to dig in was I, that I didn't even stop to take a picture of my groaning plate. Yikes. Sad too, because it was a thing of beauty. And really sad because I'm running a food blog here. Duh! Oh well, I'm in this blog thing for the long haul, so there's always next year. ~sigh~

You'll have to take my word for it, but our feast was magnificent. The turkey was tender and moist, the pork stuffing was the best its ever been, and my gravy was so good I decided it should be bottled. Really. The rest of the sides were perfect as well and the whole meal came off without a hitch. Mad props go out to Papa Diva for procuring the excellent bird and for all of his help this year, and to bro for the last minute inclusion of brussel sprouts, fresh from the garden. Additional mad props go out to my amazing sister-in-law, Kath, for that magical crock-pot stuffing, the delicious butternut squash, the crisp and savory green beans with bacon and, of course, for her always-in-demand sweet potato pie. Last but not least, further props to the husband for his carvery skills, and especially for dealing with the raw bird - a task I am happy to delegate! I couldn't have done it without you guys.

Naturally, we indulged in a holiday classic on Friday afternoon ... the "Day After Thanksgiving Sandwich." Similar to the turkey slider that was offered at the October Foodbuzz event, this yummy treat is a Diva favorite. I was making this sandwich long before I knew what it was called and its the perfect way to enjoy the meal all over again, albeit in a much smaller dose.

The Day after Thanksgiving Sandwich:
  • some sliced turkey
  • some warm gravy
  • a bit of bread stuffing
  • a bit of meat stuffing
  • a bit of cranberry sauce
The instructions are simple, the choice of bread is complex. Papa Diva prefers white bread - and frankly, he truly prefers a sandwich of sliced turkey on buttered bread - but that's a subject for another post entirely! Personally, I like to use a left-over whole wheat roll for my sandwich - its tasty and the petite size of the roll serves as much needed damage control after a day of indulgence! But, I digress. Simply heat your gravy until hot. Choose your bread and top it with some sliced turkey, the stuffing (or multiple stuffings if you're so blessed), spoon on some gravy and top it all with a dollop of cranberry sauce. Gingerly place the top of the roll on the sandwich and do your best to take a bite without covering yourself in Thanksgiving. Enjoy!

This year Papa opted to go with a left-over Snowflake roll:

... and this picture doesn't do it justice at all. I'll do better next time, and maybe we'll have him write the "Minority Sandwich Report" next year so he can explain that mysterious turkey/butter combination in detail!

Suffice it to say the Diva Family enjoyed a wonderful holiday and we hope that you did too. You may have noticed that no formal props went out to Mama Diva here. This is not an oversight. She's milking this surgery thing for all its worth (I kid, I kid!) and was happy to play Queen for a Day as we hovered around her. And that's as it should be! She gets all the props in the world just because and we were all happy to dote on her as she's doted on us over the years.

So, how did your holiday go? Curious Diva wants to know.

Bon appetite!

Wednesday, November 26, 2008

Happy Thanksgiving!

One of the things I love about cooking is the way in which it connects us to our memories. I always offer a little prayer to my mother in law when making her stuffing and I can't help but think of Gram Pam when I'm mashing turnips or making gravy. I know they're both looking down on me and smiling as I cook and think of them. While preparing for Thanksgiving, my thoughts turn to all the wonderful holidays that have gone before and the good times shared with my family.

Since today is a travel day, I thought I'd take the opportunity to share a few of those memories with you. I could talk about how we'd always forget the cranberry sauce and someone would have to run to the store. Or how my mom would usually leave the rolls in the oven, forgotten until the aroma of singed roll filled the air. Or even the year my aunt's boyfriend decided to help Gram Pam out - and roasted the turkey in a paper bag ... upside down! So many meals, so many laughs - each one delicious in its own way.

Yet, today, I'm thinking of one particular Thanksgiving, decades ago. I was somewhere around college-aged and working as a waitress in the restaurant of a retirement community. The restaurant was open 365 days a year, which often meant we were called to work on the holidays. I drew the Thanksgiving lunch shift that year and was absolutely devastated that I would miss our traditional holiday meal at Grandma's. I was also dating the husband at the time, and he graciously offered to include me in his family's meal. See, my family always ate promptly at 1 p.m. - and his chose to dine at 6. There was a method to the madness of that early afternoon meal - I was blessed to have two Grandma's cooking Thanksgiving. We'd dine with one in the afternoon, then spend the evening talking and laughing around the table of the other. It was the best of both worlds, but I digress.

So off to the husband's grandparent's house I went that year. Worried, of course, about the grim prospect of that meat stuffing and already missing my treasured family favorites. Stuffing, as it turned out, was the least of my problems. You can imagine my shock when it was announced that his family was serving ... wait for it ... lamb that year! I kid you not. Its a wonder I survived. Here I was, young and in love, anxious about making my holiday debut with his family ... and I was somehow supposed to remain gracious and choke down a portion of my least favorite food on earth? Its all kind of a blur. I think I nearly fainted and I know I was beside myself with horror - but manage, I did.

Fear not, this story has a happy ending. It was at that strange Thanksgiving meal that I had my first bite of the cherished pork stuffing and I've been a fan ever since. Frankly, the stuffing may be the only thing I ate and I can remember little else - save for the warm welcome I received ... and the huge laugh I had about it with my parents when I got home later that night. Its been a good 24 or 25 years since that peculiar holiday - and both families have been laughing about the lamb ever since. We used to tease my mother in law about it mercilessly - and she found it as funny as we did!

I suppose I should explain a bit - the husband's grandfather was no great fan of turkey. He was the chef that year and he simply didn't feel like eating turkey. Go figure! It makes for a great story and an even better memory. We tell it all the time.

So, what's your favorite Thanksgiving memory? Curious Diva wants to know!

Needless to say, I'll be gone for the rest of the week. Regular posting will resume on Monday, so stay tuned for a holiday round up and new recipes to come.

I wish you all a wonderful, blessed, happy Thanksgiving. Bon appetite!

Friday, November 21, 2008

To Stuff or Not to Stuff

... that is the question. And frankly, I think the answer's an obvious ... yes! Stuff your turkey!

Seems like the chorus of stuffing nay-sayers grows louder every year. "Stuffed turkeys cook unevenly. A stuffed turkey is a dry turkey because it takes too long to cook! Stuffing breeds bacteria!" Doom! ... Gloom! ... Disaster! ... Peril! ... whatever. I come from a long and proud line of turkey-stuffers and no one's died yet. I'm not at all belittling the real and serious health concerns here - but I'm not about to forgo the stuffing either. You can have both a properly cooked turkey and stuffing. Like many things, all it takes is a bit of care and common sense. I can give no better words of wisdom than those contained in this page from Epicurious. Its a wonderful primer on the safe way to stuff. Check it out!

In Divaworld, the larger question by far is the contents of that stuffing. Alas, we are a family divided! Having grown up delighting in Gram Pam's traditional bread stuffing, you can imagine my shock - neigh horror - when I learned that the husband's family stuffs its turkey with meat ... and only meat. What the ...?! (Seriously, these people are the most dedicated carnivores on the planet.)

But here's the thing - many years ago, in a stunning display of courage, I took a bite of that stuffing ... and ~swoon~ I've been hooked ever since! Not so much so that I abandoned our traditional bread stuffing, but enough that I now honestly crave both. When the husband and I began hosting both sides of the family for Thanksgiving, sometime back in the late 90's, the major stumbling block was the stuffing. Would we use his family's pork stuffing, or my family's bread? Knowing that neither side could live without their preference, we went with both. His mom made the pork stuffing and my mom made the bread. I put the pork stuffing in the bird and baked my mom's stuffing off on the side. Win/win. (And an even bigger win for me, because I didn't have to make either.)

Thus it was for a few years, two families united around the table - each content with the stuffing of their choice, yet blessed with the option of adding a scoop of the unfamiliar to liven up the plate. And thus it remains today - only now I'm the one making the pork stuffing. My mother in law passed away in November of 2001, just a few days before Thanksgiving. Needless to say, it was an awful time for all of us. Betty, was an *amazing* cook and that pork stuffing was one of her signature dishes. Though we were grief-struck and dazed that year, I was bound and determined to honor her memory - and comfort my family - by making her stuffing. We cobbled together a Thanksgiving dinner, because she would have wanted us to, and I somehow managed to recreate her stuffing without a recipe.

I made an exhaustive search of her extensive recipe collection and her kitchen, and the stuffing recipe was nowhere to be found. It never did turn up. I did my best to remember all the wonderful flavors contained in that stuffing, went with my gut and my formidable palate, and just started cooking. I don't think it was exactly right back then, but I've been honing the recipe ever since and by now I know I've got it. To this day I wonder where she kept that recipe? Perhaps it was in her head; I know it was in her heart. Betty was never happier than when her family was at her table - and our table is incomplete without her.

This is my version of her pork stuffing - written with no amounts, because there is no recipe. It is the epitome of my "pinch and dash" style of cooking. As such, it may be of little use to you - yet I offer it in tribute to Betty and because I hope you'll find it interesting.
~~~~~~~~~~~~~~~~~~~~~~~~~~~~~~~~~~~~~~~~~~~~~~~~~~~~~~~~~~~~~~
Pork Stuffing:

Get the biggest skillet you can find, and in it, saute 4 pounds of very lean ground pork in a bit of butter and olive oil, along with one large minced onion and two large ribs of minced celery over medium-high heat. Once the meat has cooked, pour off most of the fat and add: lots of Bell's Poultry Seasoning, some ground sage, a few shakes of fennel seeds, a healthy dose of pumpkin pie spice, some fresh thyme, a tiny bit of ground cloves, a shake or two of celery salt, a grating of fresh nutmeg, and some kosher salt and freshly ground pepper. To the pan, add two Yukon Gold potatoes that have been peeled, par-boiled and cut into small dice. The potatoes will cook down and give the stuffing a nice texture. Add some chicken broth to the pan, reduce the heat to low, and simmer the the mixture, covered, for about an hour, stirring occasionally and adding a bit of broth as needed to keep it moist. After an hour, taste and re-season with any and all of the above spices - adding more until it tastes like "mom's." Once the proper taste has been achieved, add a tablespoon or two of seasoned breadcrumbs to bring it all together. Remove from heat, transfer to a large bowl, cover and refrigerate.
~~~~~~~~~~~~~~~~~~~~~~~~~~~~~~~~~~~~~~~~~~~~~~~~~~~~~~~~~~~~~

As it turns out, today is the anniversary of her passing. Though I hadn't intended it that way, it seems fitting that our discussion of stuffing should take place on this day. I wish I knew the real recipe. And more than that, I wish I had taken the opportunity to watch her make the stuffing when I had the chance. How many treasured family recipes have been lost to the ages for lack of them being written down? The husband is thrilled with my recreation efforts - and so am I. I can't imagine Thanksgiving without both stuffings and, happily, I don't have to. Though let this be a warning to you - write down those secret family recipes! Future generations will thank you and present ones will not have to spend seven years recreating them.

So, what's inside your turkey? Curious Diva wants to know.

Bon appetite!

Thursday, November 20, 2008

Glorious Gravy

I know what you're thinking, so go ahead and ask ... "Why is there a picture of a turnip attached to a post about gravy?" Curious, isn't it? Patience. All will be revealed.

But not before I offer a few more turkey tips. I came across another link which may prove useful for our novice roasters. The USDA has a page entitled "Lets Talk Turkey" and it contains a wealth of information on thawing, roasting, storing and reheating turkey. Well worth a pass of the eye, even for you experts out there. While perusing the page, it occurred to me that I neglected to mention one very important thing ... be sure to remove any giblets, etc., from the cavity of your turkey prior to stuffing and or roasting it! I have no idea why they stuff all those gross things into the bellies of our birds - but failure to remove it will result in one foul fowl. Trust me, I know whereof I speak. (And I'm speaking of the first chicken I ever roasted ... then promptly pitched because it was inedible. Blech.) This is a mistake one only makes once - best to avoid it altogether. Perform a cavity search - or better yet, if you got a husband lying around, make him do it - then proceed accordingly.

Now, about that turnip ... or perhaps you call it a rutabaga? In Divaland, its a yellow turnip and it is the key to making a rich, savory gravy. Before you call me crazy, let me explain. This is an old family tradition, a secret if you will, passed down to me from my beloved Grandma Pam. Gram Pam, as we used to call her, made the very best gravy in the world and she always used the turnip cooking water as a base. Her gravy had a flavor unlike any other I'd ever had and it was the highlight of every Thanksgiving.

Like most families, we never really wrote her recipe down - but we all knew about the turnip water and we continue that tradition today. Happily for us, I've been able to replicate the taste of her outstanding gravy ... unhappily, for you, there is no recipe. And that's the case with much of the food I prepare for Thanksgiving. The gravy, the stuffing, and all of the sides are the result of me cooking on the fly - and thus difficult to capture in an exact configuration. I'll do my best, but really, we're just talking technique here.

To prepare the gravy, I use the following:
  • the water saved from boiling 2 gigantic yellow turnips
  • some of the reserved herb butter used in roasting the turkey
  • the pan juices resulting from the roast turkey and aromatic vegetables
  • some Vin Santo or brandy
  • some chicken broth, if necessary
  • salt, pepper, a dash of poultry seasoning and some minced fresh sage
  • some all-purpose flour
  • some of the rendered turkey fat
Once your turkey is done, remove it from the roasting pan, set it on a platter and tent with foil. Carefully drain all of the fat and accumulated juices from the roasting pan into a de-fatting cup, while leaving the roasted veggies in the bottom of the pan. Allow the juices to sit in the de-fatting cup - the fat will rise to the top and the juices will be on the bottom.

Place your roasting pan* on the burners of your stove over medium-high heat and deglaze the bottom of the pan with some Vin Santo or brandy and a bit of the turnip water. Bring the mixture to the boil and scrape up all of the browned bits with a wooden spatula. Add a bit of the left-over herb butter and the rest of the turnip water, stirring constantly to be sure to disolve all of the roasted goodness. Carefully add the separated juices from the de-fatting cup, being careful not to allow the fat into the pan. Reserve the fat for later use.

If you need more liquid, you can add some chicken broth. Use your judgement. Once the pan has deglazed, taste the gravy base for seasoning, adding some salt, pepper or some herbs if desired. When you are happy with the flavor, strain the sauce through a sieve and discard the roasted vegetables. Place the sauce back in the roasting pan and bring it to the boil.

In a small bowl combine 2 tbsp. of all-purpose flour with about 1 1/2 tbsp. of the reserved turkey fat. Stir well to combine. Add this mixture to the sauce and whisk constantly over high heat until the gravy begins to thicken. You can continue making and adding more flour/fat until your desired consistency is achieved. I prefer that the gravy be of medium density, but your mileage may vary, of course. Once it has thickened, turn the heat to low and keep warm until use. That's really all there is too it. The finished gravy does *not* taste like turnips, but that liquid gives the final product that certain je ne sais quoi. Really. Its delicious!

*Because you will be heating the roasting pan over high heat to deglaze and form the gravy, you need to be sure that your roaster is of quality material and able to withstand high heat. This is why I forbid you to use a foil roasting pan. A dark, heavy-bottomed roaster is the way to go. Do not attempt to heat and deglaze a glass roasting pan, it will shatter. This technique applies only to heavy, metal roasters.

If you've not made gravy before, this may seem rather complex. I assure, its not. Good gravy is simply the result of good ingredients, a good pan, and a bit of care and tending at the end. For a better explanation, I now direct you to an article which appeared in yesterday's New York Times. While I disagree with some of what's written, its an excellent overview of the process and includes actual recipes. The article mentions that you can make gravy in advance and freeze it - which is something I typically do as well ... but you'll have to wait until next year for that recipe!

Meanwhile, tell me about your gravy. Curious Diva wants to know.

Bon appetite!

Wednesday, November 19, 2008

Turkey Tips: Part Two

I'll give you a minute to turn your monitor 90 degrees to the left ... and use that time to assure you that I have done everything in my power to right this photo. It appears normally in my pictures file - yet magically (or should I say nefariously?) it flips as soon as its uploaded here. Whatever. Either way you look at it, that's a picture of my beautiful bird from Thanksgiving 2007. It was every bit as good as it looks. So good, in fact, that the pack of vultures I lovingly call my family nearly picked it clean!

I'll do a better job with the turkey photography this year - but my recipe will not change. Here it is:

Roasted Turkey with Herb Butter:
  • 1 stick of butter, softened
  • 3 tbsp. of chopped fresh parsley
  • 2 tbsp. chopped fresh sage
  • 2 tbsp. chopped fresh thyme
  • 3/4 tsp. Kosher salt
  • 1/2 tsp. freshly ground black pepper
Place the softened butter in a bowl and to it add the chopped herbs, salt and pepper, stir well to combine. Cover tightly with some plastic wrap and reserve in the fridge. I prepare the butter the day before Thanksgiving and remove it from the fridge early in the morning so it can soften a bit before use.

For the turkey:
  • one batch of herb butter
  • one whole turkey (determine size by using the calculator)
  • Stuffing of your choice, if desired*
  • 1 large parsnip, peeled and cut into large chunks
  • 2 large carrots, peeled and cut into large chunks
  • 1 medium onion, peeled and quartered
  • 8 to 10 shallots, peeled and halved
  • Some good quality Vin Santo
  • Some chicken broth
Bring herb butter to room temperature before using. Pre-heat your oven to 350 degrees and position the oven rack in the bottom third of the oven.

Place your turkey in a large roasting pan and scatter the parsnips, carrots, onions and shallots around the turkey in the bottom of the pan. Sprinkle main cavity of turkey with salt and pepper and fill with your desired stuffing, if using. Starting at neck end, carefully slide your hand between skin and breast meat to loosen skin. Spread 3 tablespoons of the herb butter over breast meat (under the skin). Then rub 4 tablespoons herb butter over turkey skin on the outside of the breast and drizzle about a 1/2 cup of Vin Santo over the turkey.

Throw the whole shebang into the oven and roast for the necessary amount of time - as determined by the turkey calculator and your trusty instant read thermometer. Keep an eye on your bird, and when the breast has browned to your satisfaction, cover it with foil. About half-way through your roasting time, add some chicken broth to the bottom of the roasting pan - about a cup or so and continue roasting until the turkey is done.

Once it has cooked, remove it from the oven, tent the whole thing with foil and allow the bird to rest for 20 to 30 minutes before carving. You can use this time to make the gravy ... which we will discuss tomorrow! By the time the turkey has cooked, all of those delicious aromatic veggies will have caramelized and they will lend outstanding flavor to your gravy ... so don't throw them away.

*We'll get to the stuffing later in the week as well. Stuffing is a sensitive subject. Bread? Meat? Both? Neither? Its enough to make your head spin - and far too complicated to begin discussing now. We'll cover the topic on Friday. Stay tuned.

Meanwhile, what size bird will you be roasting this year? Hungry Diva wants to know!

Bon appetite!

Monday, November 17, 2008

Turkey Tips: Part One

Much as I'd like to deny it, we're getting closer to the BIG day; the most important eating holiday of the year. While I'm nothing if not a gracious hostess, I must admit that there's a small part of me that approaches Thanksgiving with a mixed sense of joyous anticipation and ... abject terror. Ok, so maybe terror is too strong a word - but you try fitting 16 people around a table that seats eight and see how Zen you feel! But, I digress. And, really, I exaggerate. I've been hosting the Diva Family Thanksgiving for years now. My holiday runs like clockwork and your's can too ... as long as you've got a plan of attack.

A little bird told me that a loyal reader ... who has yet to speak out in the comments ... is hosting her first Thanksgiving and in need of some tips. (Yes, Lauren, I'm looking at you!) Thus, without further ado, I now present my most cherished Thanksgiving secrets.

  • Follow this link to the Food Network's website and scroll down the page to their miraculous Turkey Calculators. The first one will tell you what size turkey you'll need to feed your crowd and the second calculator will tell you all you need to know about cooking it. Simply input the size of your bird, indicate whether or not it will be stuffed, and choose your desired dining time. That's it! Like magic, this spectacular tool will do the rest of the work for you and even tell you when to begin roasting your turkey. This is the most valuable link I will ever post. Learn it, know it, use it, love it!
  • The above magic notwithstanding, ovens vary greatly in terms of cooking speed - so get yourself an instant read meat thermometer and use it properly. Your turkey is done when an instant read thermometer - inserted into the thickest part of the breast or thigh - reads 165 degrees. DO NOT - and I can't stress this enough - rely on your turkey's pop-up timer. This is the most useless gimmick ever invented. Without fail it will pop too soon or, in some cases, may not pop at all. Forget the pop-up deal and take the turkey's temp yourself. If you know your oven runs fast, begin checking an hour before the indicated time and proceed accordingly.
  • Basting is over-rated and largely unnecessary. Season your turkey well with a lovely compound butter, throw some savory, aromatic veggies in the bottom of the pan, place the turkey in the oven and forget about it. Half-way through your roasting time, add some chicken broth to the bottom of the roasting pan, close the oven and forget about it again until its time to start checking the bird's temp. I have never in my life served a dry turkey and I don't baste.
  • Let your turkey rest for 20 to 30 minutes before carving it. The turkey will continue to cook a bit as it rests, so be sure to account for that by removing it from the oven when the temperature reaches 165 degrees. Cover the bird with foil, tell your guests to back off and remember that patience is a virtue ... the juices will redistribute themselves as the turkey rests and your patience will be rewarded with moist, delicious tenderness.
  • Some recipes will tell you to cover your bird's breast with foil during the initial phase of roasting and remove the foil later to let it brown. I discount such notions as poppycock and insist on roasting my turkey uncovered until it has achieved a rich, mahogany color. Like I said, I've never served a dry turkey and this method has always worked for me. Keep an eye on the bird, once it has browned to your satisfaction, cover the breast with foil and proceed. Use your judgment and don't drive yourself crazy over it.
  • Lastly, make sure your roasting pan is large enough to accomodate both your turkey and the aromatic vegetables used in roasting. Do not cram a giant bird into a tiny pan - you'll be sorry if you do and you'll have a huge mess on your hands. Be sure that the whole bird, legs and all, fit within the confines of your pan. If you're going to be hosting and roasting a fair bit, you'd do well to invest in a quality pan. I adore my Calphalon roaster! A good, dark roasting pan is the key to a rich, savory gravy and a well-browned bird. I wouldn't dream of roasting a turkey without it - its well worth the investment.
  • DO NOT, under any circumstances, use a foil roasting pan. Don't even THINK about using one. Period. I will say no more.
Thus begins our Thanksgiving mini-series. Follow these tips, and those to come, and you'll be well on your way to a Divalicious holiday. Stay tuned for Turkey Tips: Part Two ... wherein I will divulge the recipe for that delectable compound butter I mentioned. Trust me, this one is a keeper and guaranteed to yield a moist, picture-perfect bird every time. Come back tomorrow and I'll tell you all about it.

Meanwhile, what's your favorite turkey tip? Curious Diva wants to know!

Bon appetite!